DIY: Feather Anklets


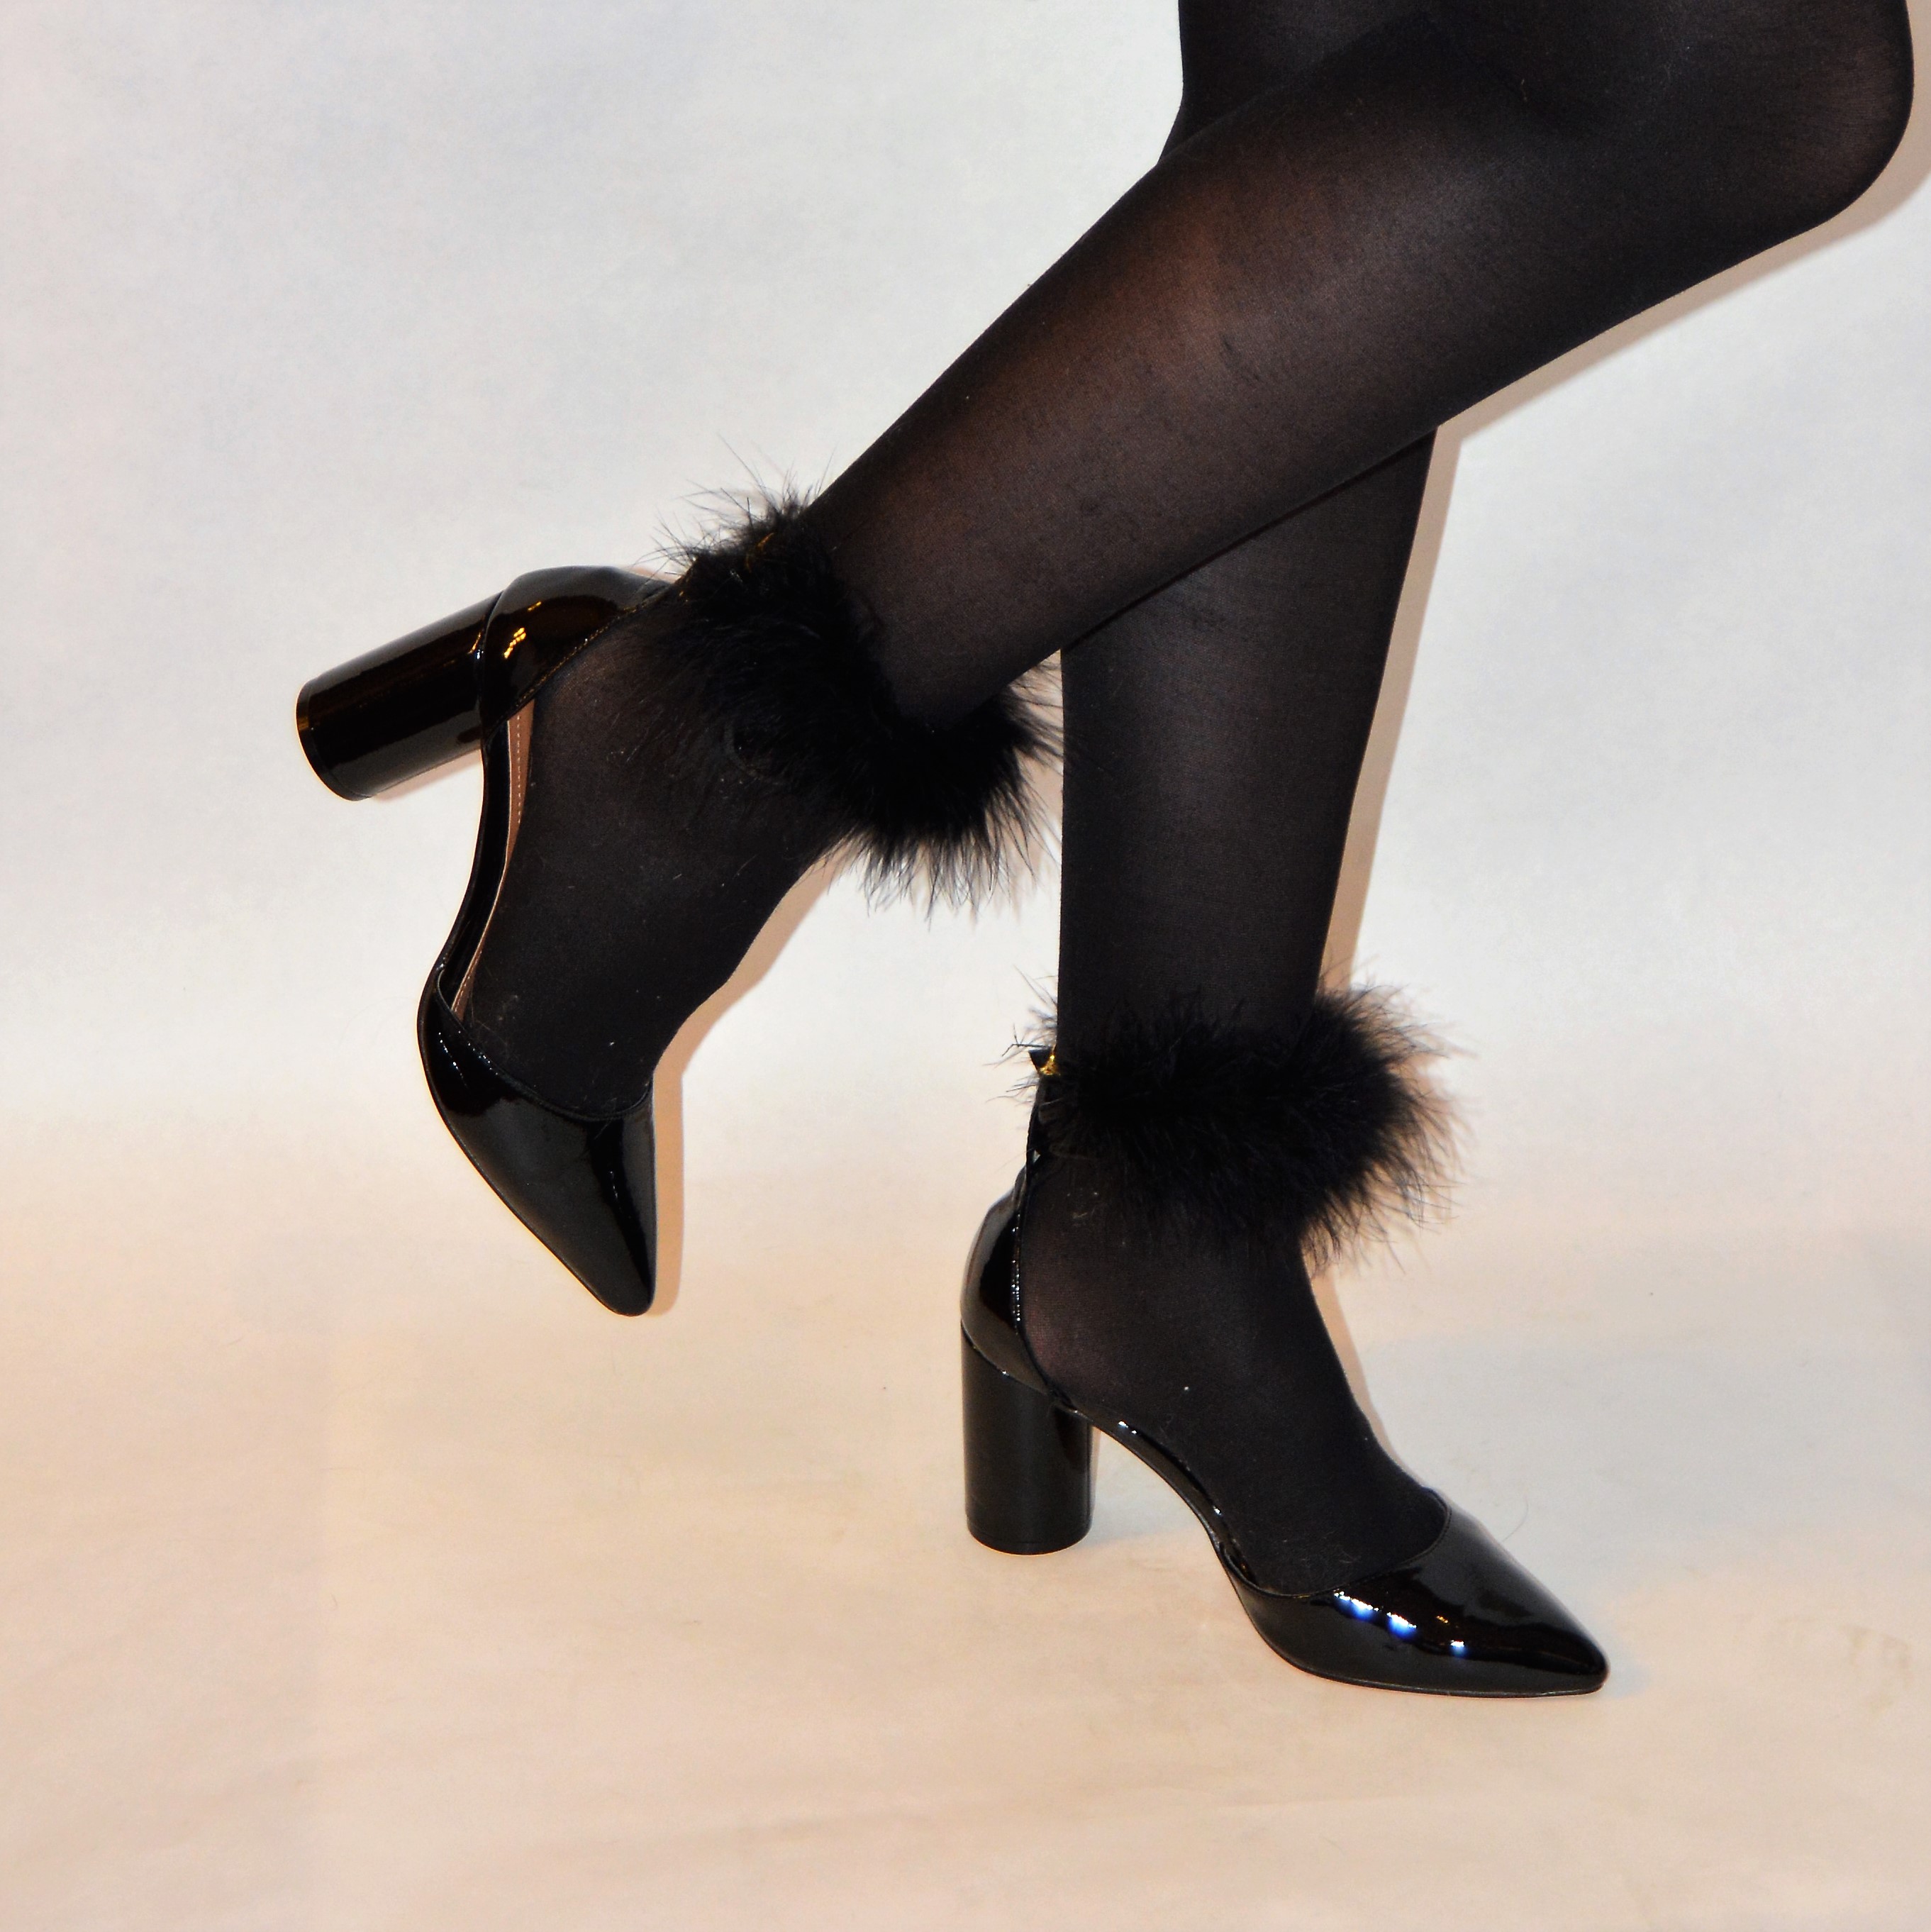
Anklets is a really nice detail to add to any outfit so I decided to make these feather anklets. Pair them with a pair of pumps or sandals and you’re good to go. I added my anklets over the ankle strap on my pumps to cover them and give them a new look.
To make these anklets you’ll need:

I started out measuring around my ankles two see how long the pieces should be, then I cut the feather trim. Keep in mind: The feathers will make a mess…

After cutting I took a clothing roll to get rid of the feathers before they began to fly around to much.

Take you piece of string and cut it in four equal pieces, they don’t need to be as long as mine but since I have plenty of this string I didn’t really think so much about it.

Take one string and fold it in half.

Then take your needle and thread and pull through the string back and forth a couple of times (knot the ends of the thread as a final step) to create a loop which doesn’t need to be big at all . You just need to be able to get the jump rings through later.

Repeat the steps with the rest of the strings and at the end you should have something that looks like this:


Then take your feather trims and sew on the loops at each end. I used the thread already on the loop but you can just take a new piece of thread if you want.

You should have something that looks like this and once you’re done just cut the strings and threads off.

Finally add your jump rings and lobster clasps in your desired metal and you are finished!

Here is how mine turned out:

Have fun creating!
#fashionpsychic #fashion #jewelry #diy